
I have been teaching a class on advanced bindings, and I have found that many quilters are challenged with closing the beginning and end of a binding so it is smooth and you can’t find it easily.
There are a lot of tutorials on this subject, but there are as many methods as there are quilters. This is my approach.
First, when I start sewing binding on a quilt, I start on one side, about 6 inches or more from the bottom corner. I leave an 6-10 inch tail of extra binding and then back stitch when I start to attach the binding. In the sample pictures, I am sewing on a machine finished binding, so I am sewing it to the back of the quilt.

I sew around the quilt and miter each corner (a tutorial for another day). On the last side, I sew down the binding to about 8-12 inches away from the starting point and backstitch. A smaller space will make it more difficult to connect the binding edges, especially on a big quilt. There is no particular downside to having a larger gap, as long as you accurately measure for the connecting seam. You should have at least 7-10 inches of binding at the end that is not attached to the quilt.


Now comes the fun part. Lay your free binding ends flat on the edge of the quilt and overlap them. There should be plenty of overlap (more than 3 inches). Cut a small piece (about an inch wide is enough) from the end of one of the binding tails. This will be your measuring piece.

Choose a point for your binding ends to meet. It should be roughly in the middle of the gap. Lay your measuring piece with the center crease on the point you selected.


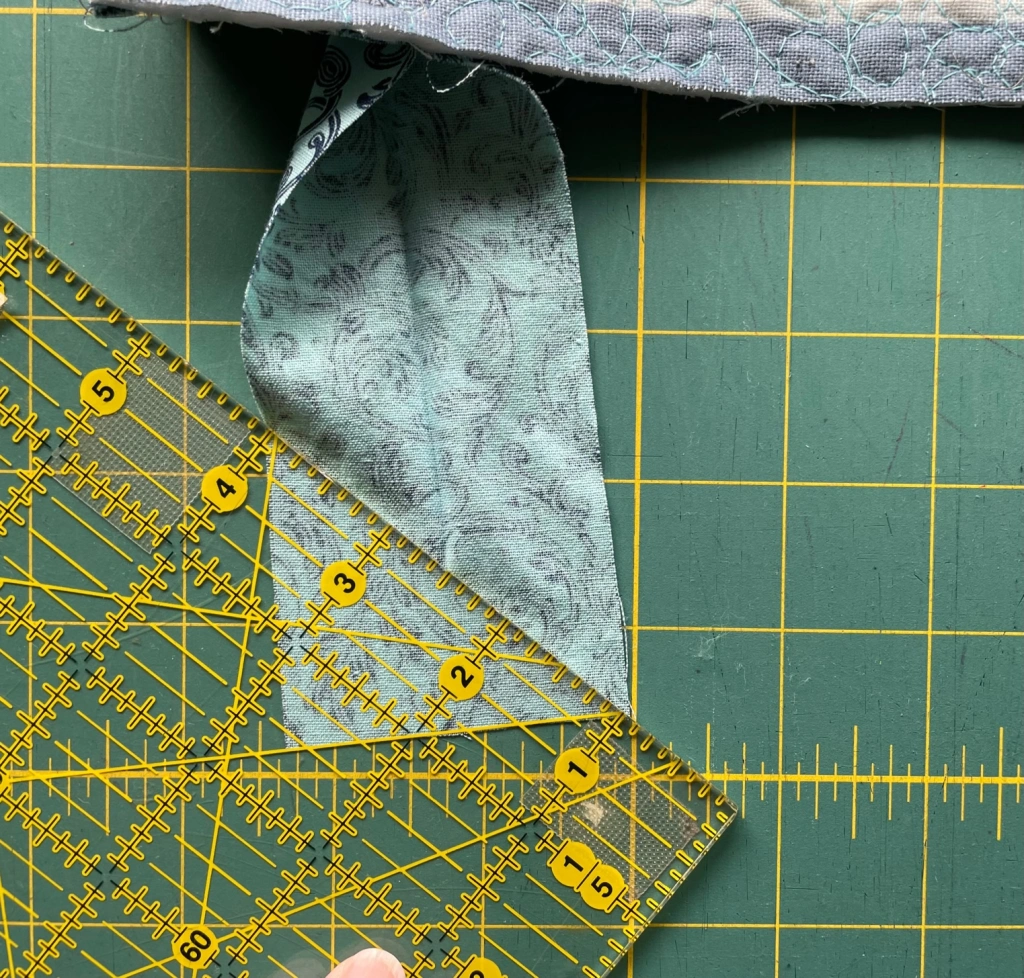
On the piece coming from the right side, go to the far left end of measuring piece and mark or cut the fabric. I prefer to cut it at this point, but it makes some people nervous.
On the piece coming from the left side, go to the far right end of the measuring piece and cut or mark the fabric.
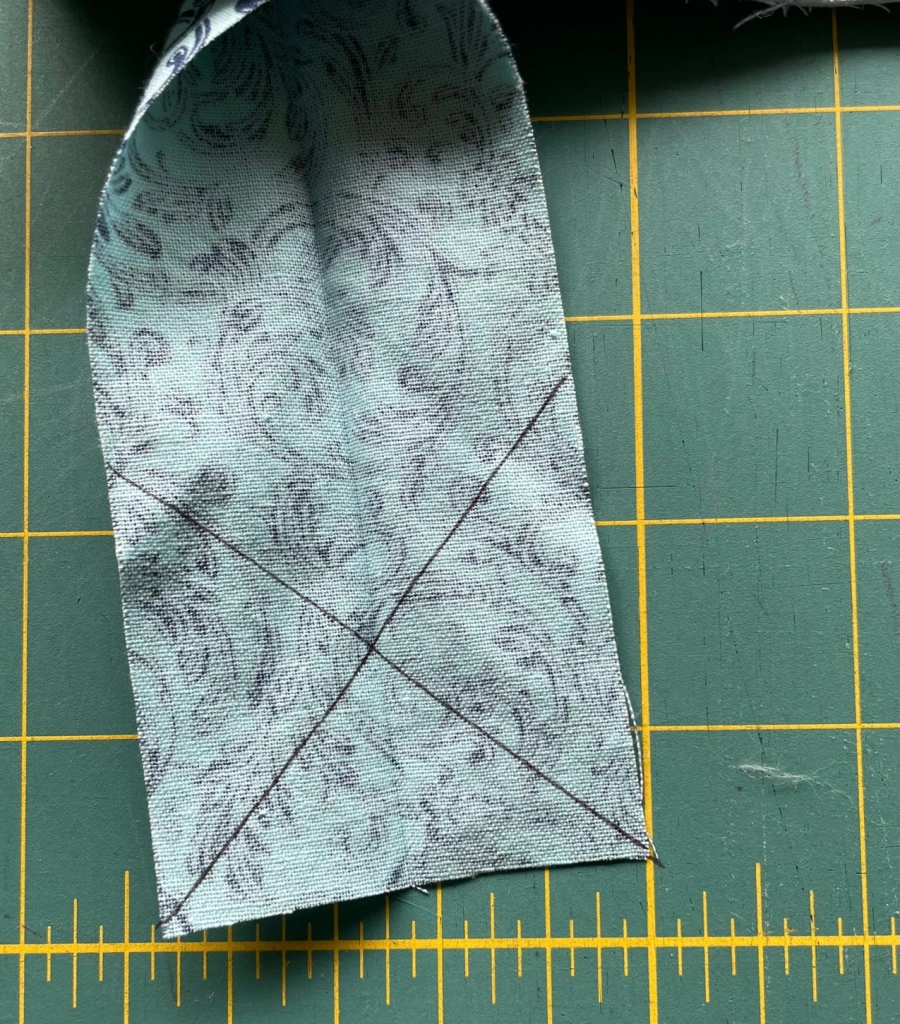
Now open up both ends, and on the wrong side of the fabric, make an X in the square at the end.

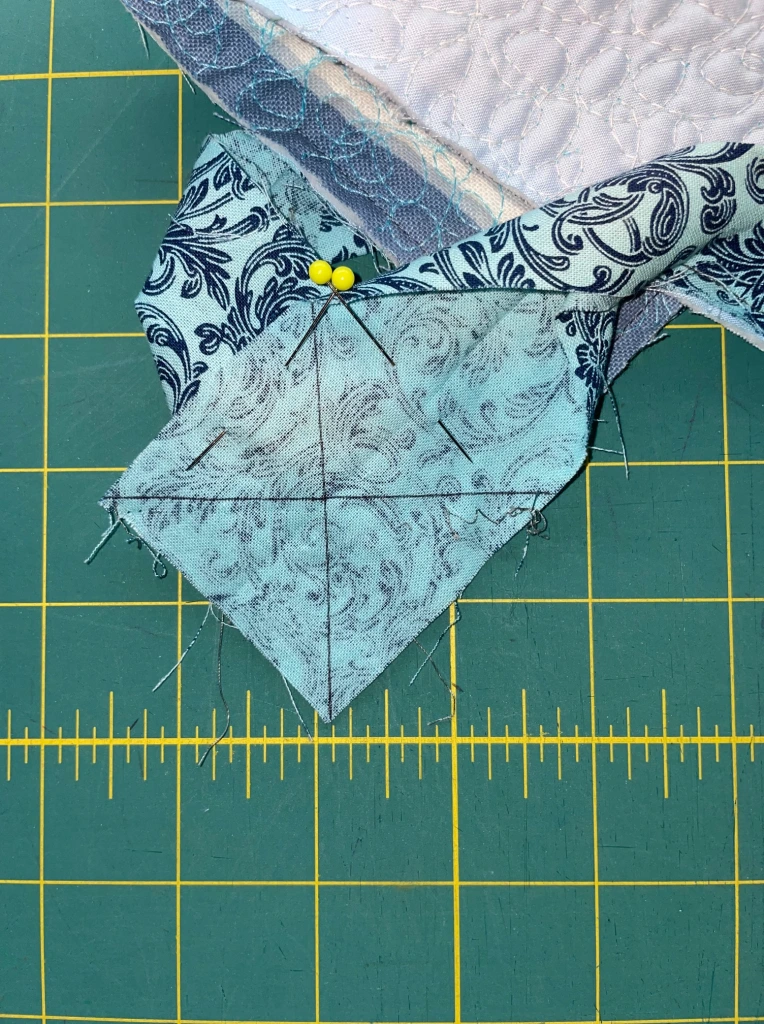
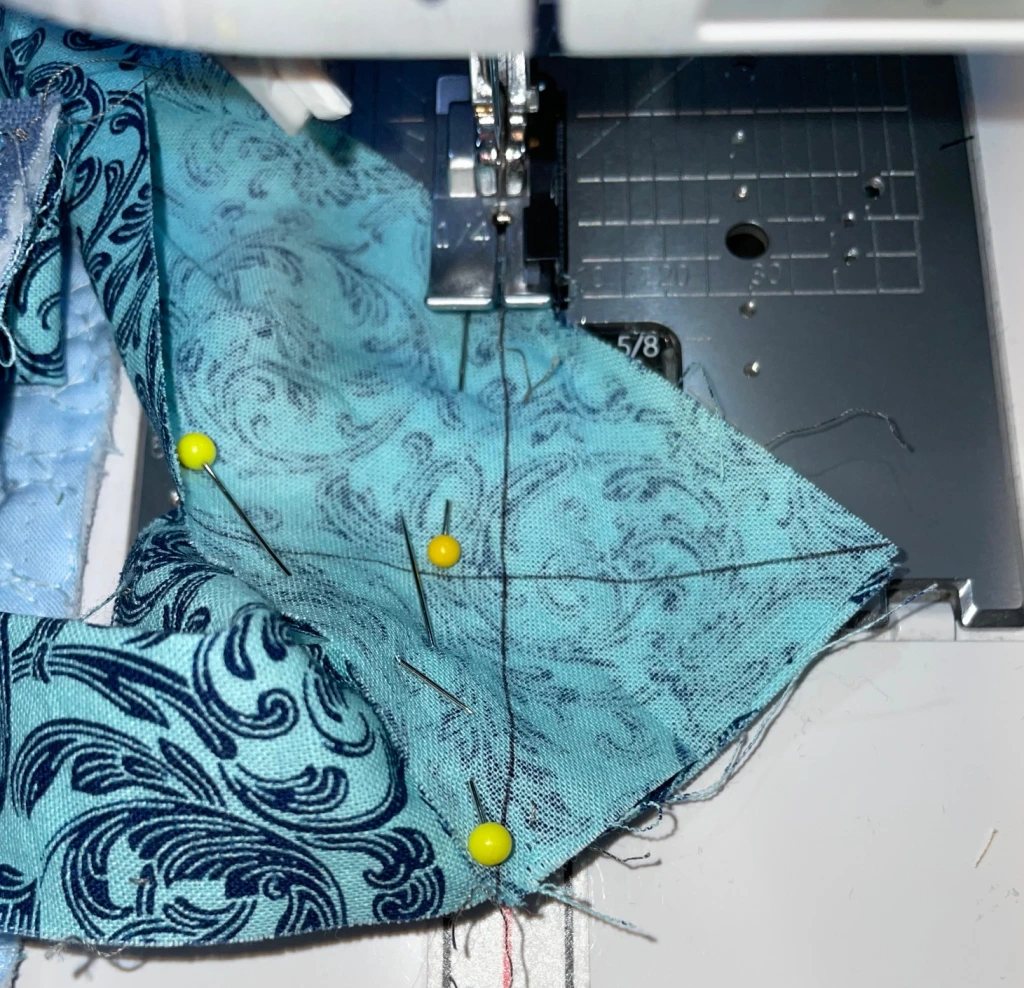
Position the fabric right sides together at a 90 degree angle in the square you just marked with an X. Pin to secure. NOTE: It is sometimes easier to do this if you fold the quilt in half at the point of the gap.

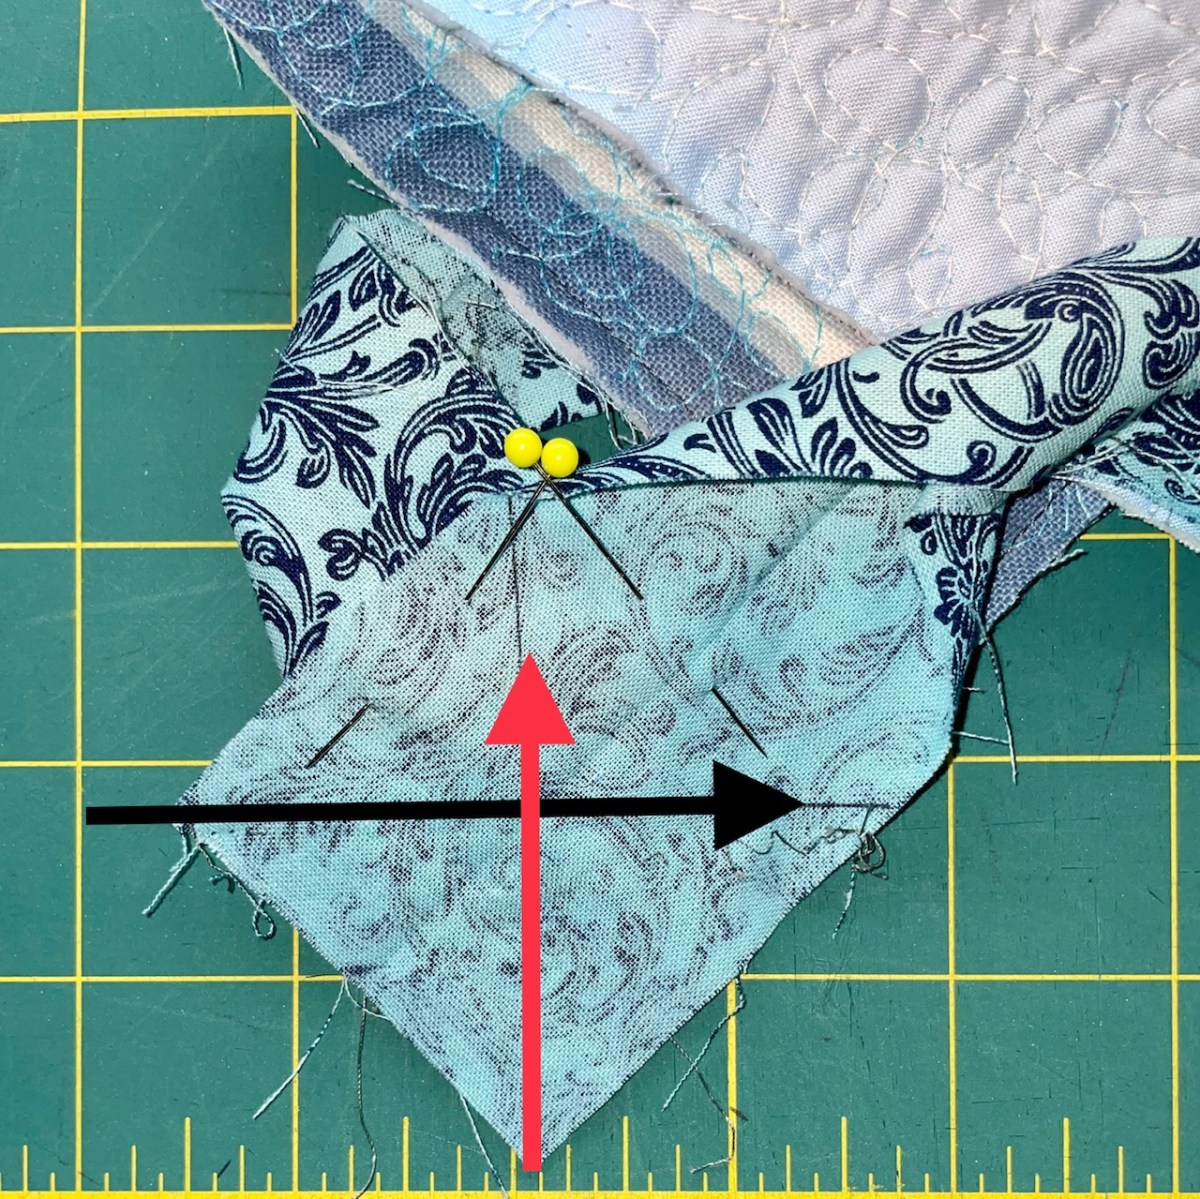
Take a good look at the tail coming off the intersection of the fabric. If you cut off the long ends, imagine where they were. Think of the two long tails as the “legs” of the binding. You want to sew across the “waist” of the cross fabrics, to give the binding a “belt” (the black arrow). You do NOT want to sew between the legs (the red arrow). (This tip comes from Kat Martinez at Capital Quilts. She says to “give the binding a belt, not a wedgie” and it is the best way I have ever heard to remember this. (By the way, this tip also works when sewing long strips of binding together at an angle.)
If you are making a flanged binding, put a pin through the seam between the flange and the binding fabric on one side where the “waist” mark intersects the seam. Make sure the pin goes through the seam on the other piece. The pin will not be at the center of the X.
Pin on either side of the “waist” line. It is especially important to pin on the “body” side because that side has more tension pulling on the seam area. Sew carefully on the “waist” line, taking out the pins before you sew over them.
I sew across and then check the binding before cutting off the ends. The binding should lay flat.

Trim the seam allowances to 1/4 inch and finger press them open.

Fold the binding on the center line and press.

Lay the binding on the edge of the quilt and pin. Start sewing with a backstitch a few stitches before the gap. Continue until a few stitches past the original starting place and back stitch.
Turn over your quilt and press the binding to see the seam. It should be almost indistinguishable from other seams in the binding.

Hope this helps with your binding joins. Happy binding!
