Categories
Patterns and tutorials

A Hanukkah Quilt Festival of Lights aka Candles Burn Bright

I spend a few minutes (usually less than 15) on Instagram most days. I connect with many other quilters and am amazed by their creativity and talent. I also hear of some interesting opportunities. This year, around the middle of March, I saw a post from Golden Peak Media, the parent company that publishes Quiltmaker, McCall’s Quilting, Quick and Easy Quilts, and more. They were looking for Hanukkah quilt designs, and their deadline was less than 48 hours away. I happened to have a free evening and I decided to play around with EQ8 and see what I could create. I ended up with the design above, which I submitted.

I was beyond surprised when I got an e-mail less than a week later letting me know that they wanted to publish my quilt in Quiltmaker! I got the e-mail the day after my birthday, and it was a fantastic birthday present.

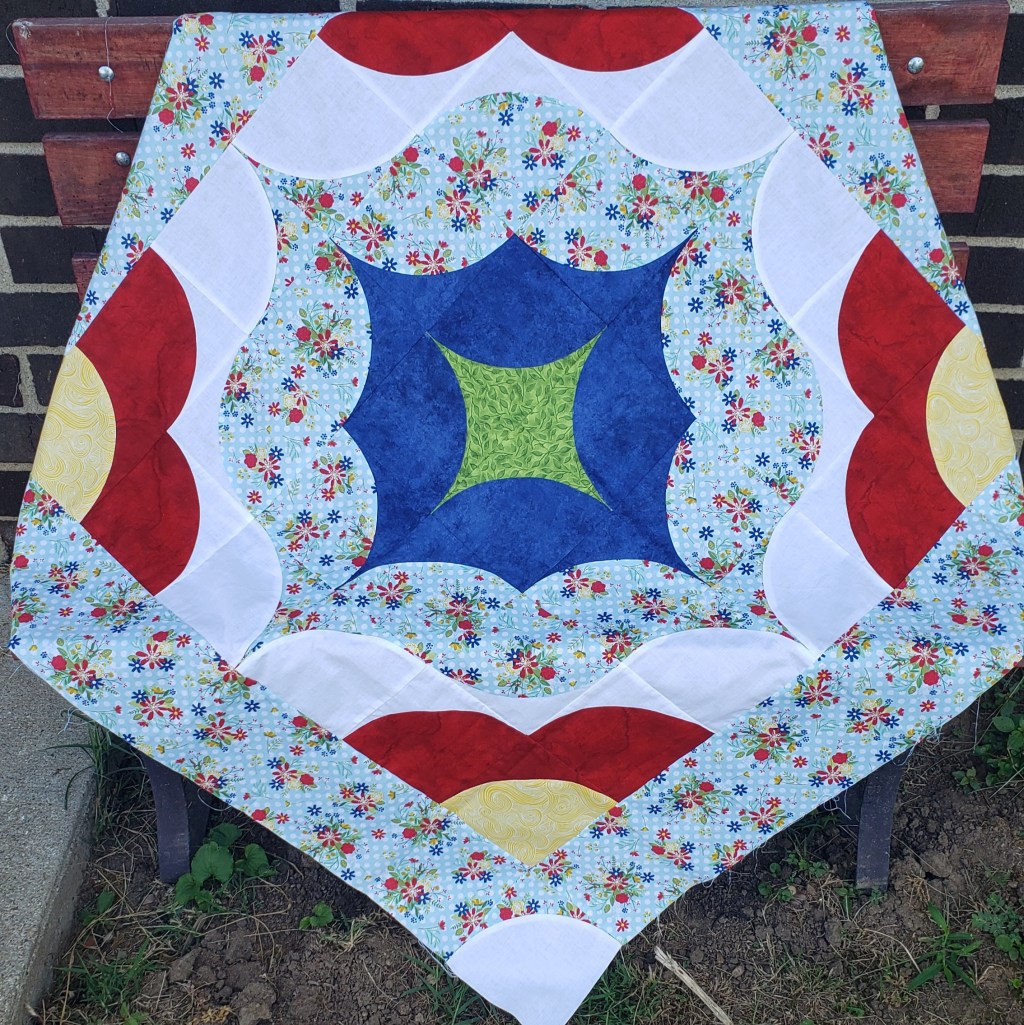
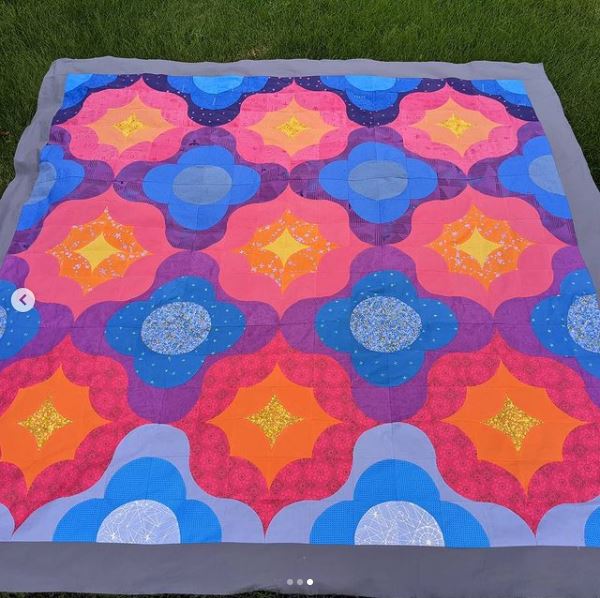
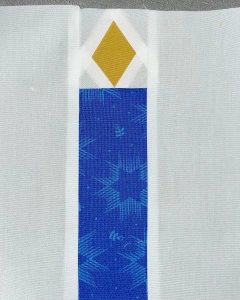
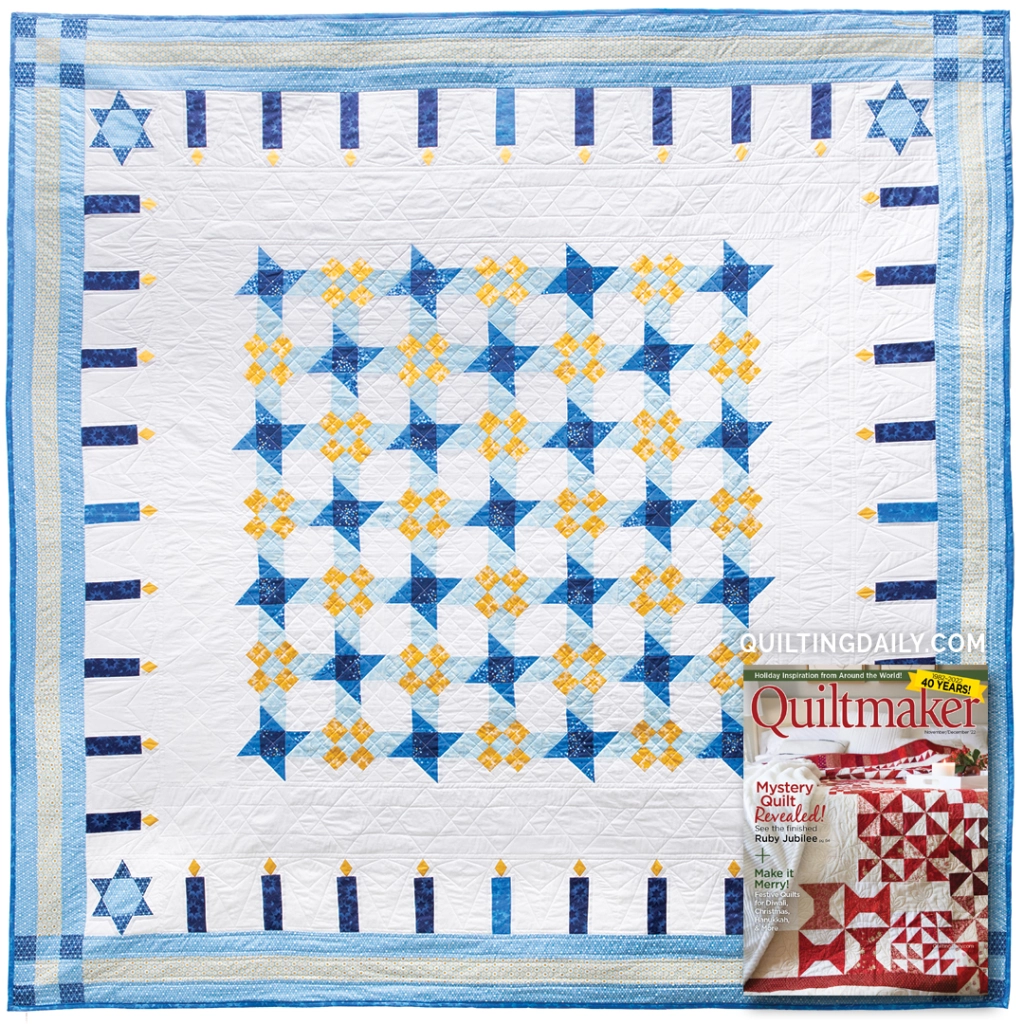
The wonderful editor sent me a digital catalog of Andover Hanukkah fabrics I could use for the design. After playing around a little and exploring different options with the fabric, I came up with this design.

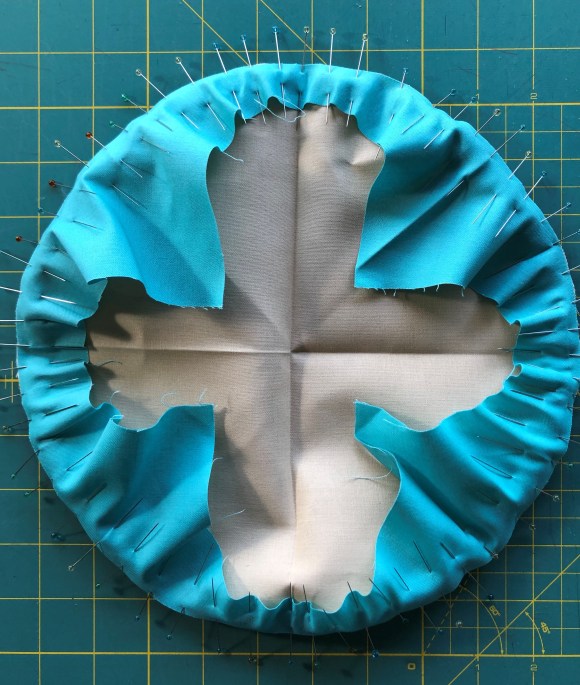
This pattern includes many symbols of the holiday, including the Star of David, flames, spinning dreidels and gold pieces or geld. For this version, I used a different method to form the gold pieces, and changed the background of the spinners so the background “ribbons” stop at the edge of the gold pieces. (You can see where I missed one on the picture above).

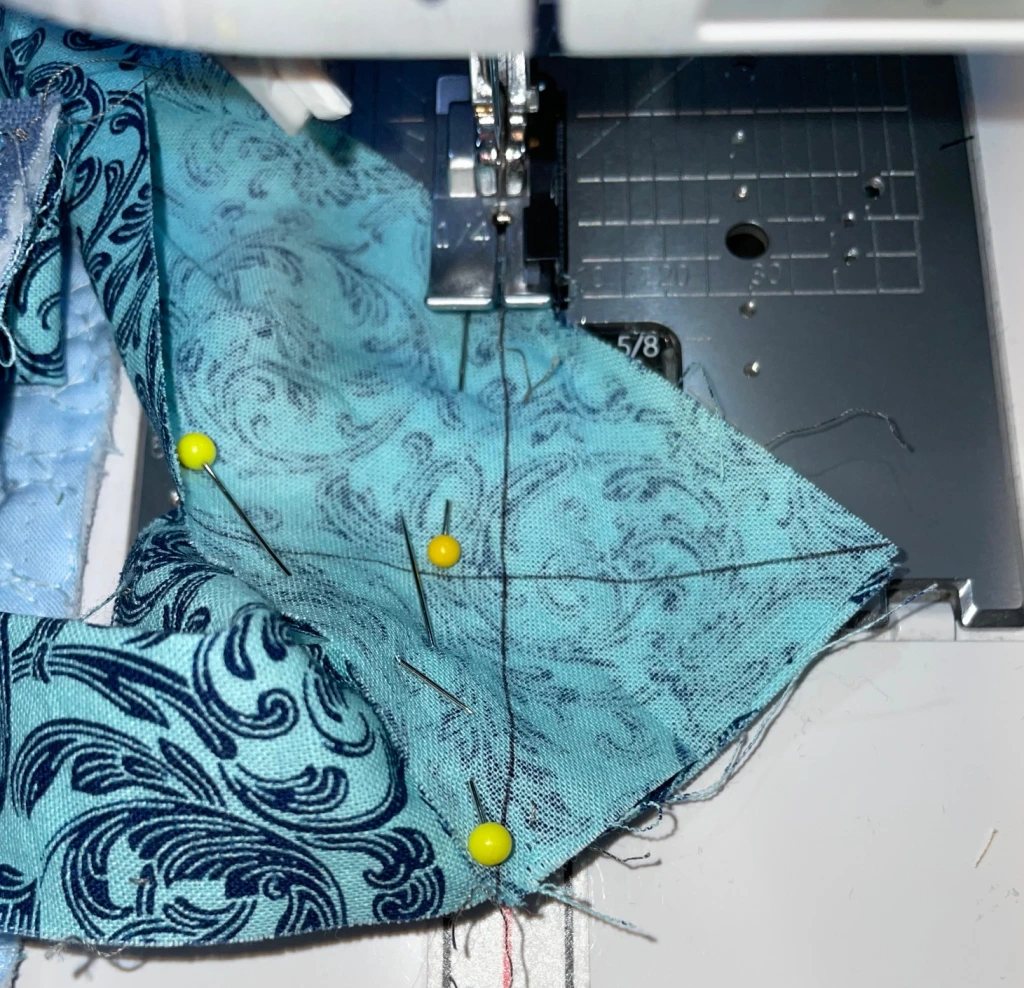
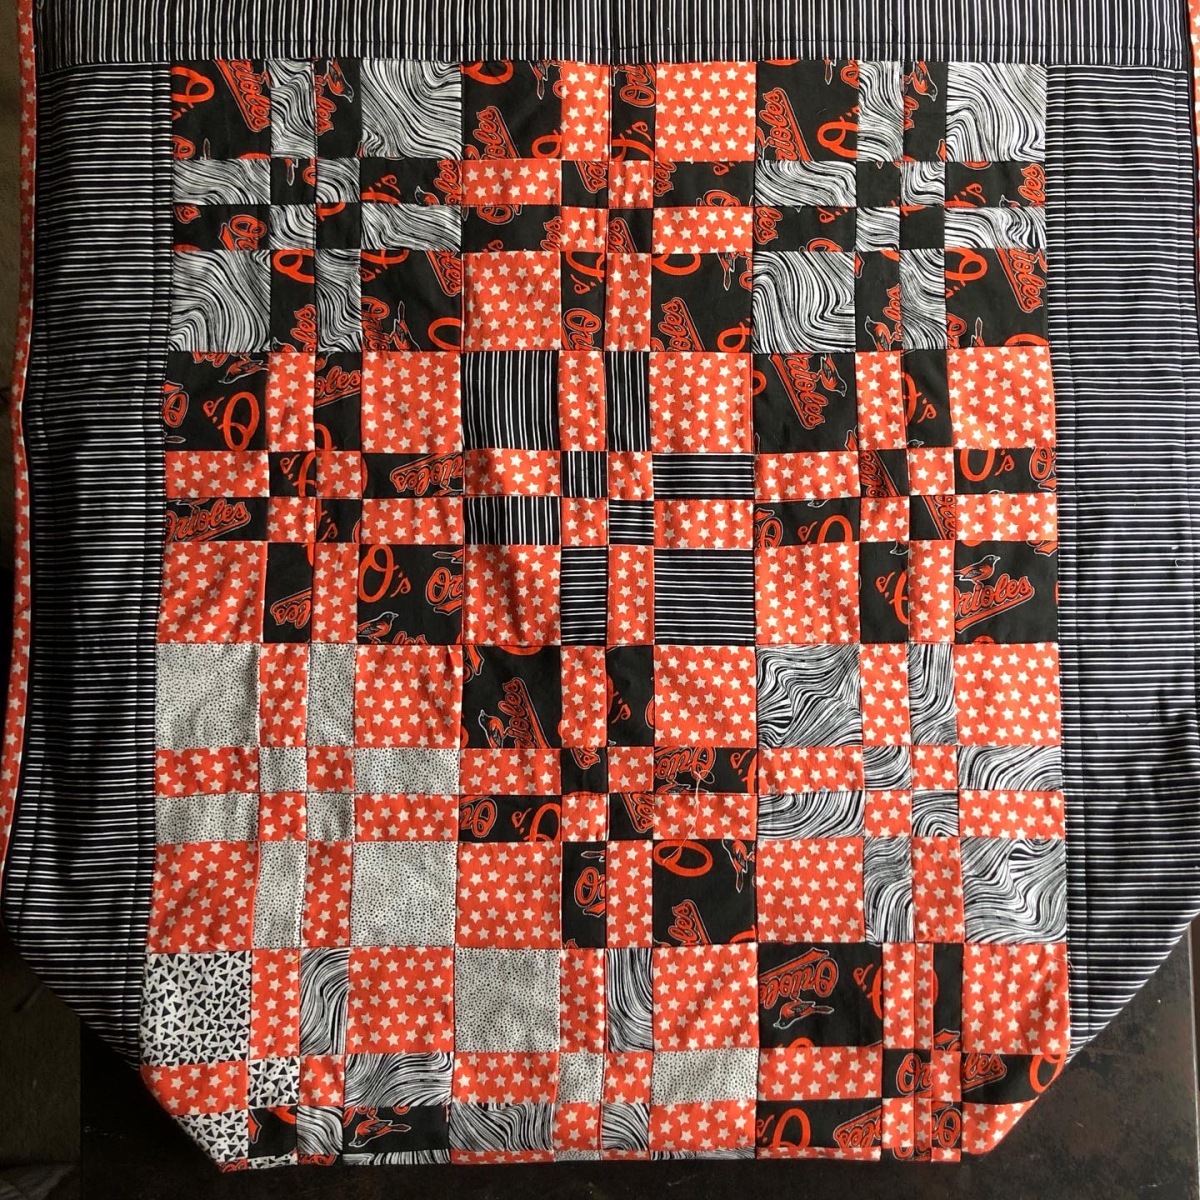
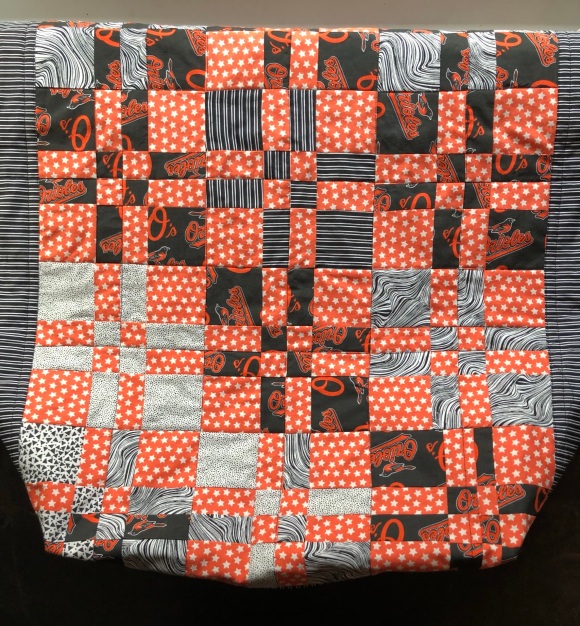
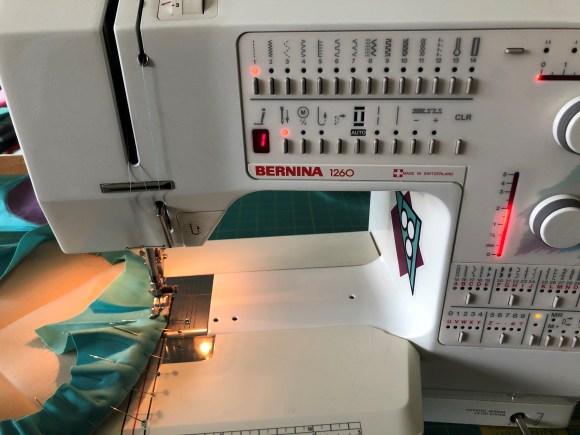
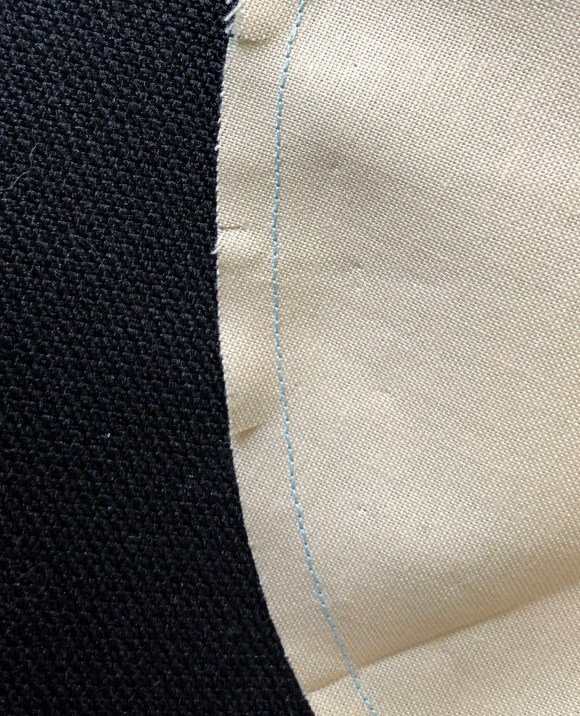
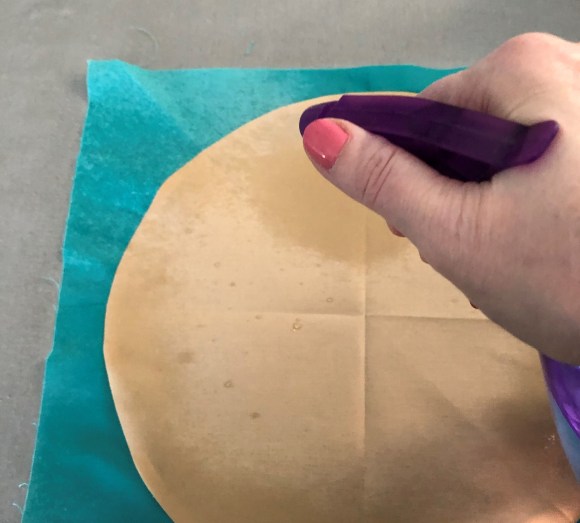
I received all of the material from Andover. And Hobbs agreed to supply the batting for the project. I started making blocks and sent many “in progress” photos to the editor. Here are a few of them.

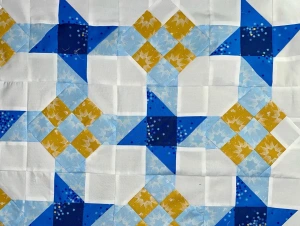
Of course, I had to keep the project and the pictures secret. I had one major issue. I made all 36 candle blocks and then realized that I cut the white background squares too narrow. I had to ask for more fabric, then seam rip 72 seams. Unfortunately, the fabric got lost in shipping. I did everything else I could on the quilt and then started hunting for the right shade of Andover Century Solids for the background. I started looking at Capital Quilts in Gaithersburg and to my great surprise, their website said it was in stock. I was surprised because I had not seen Andover Century Solids at the store. I went in and asked Marianne, the owner, where I could find the fabric, as it was not with the other solids. She first said that they did not have it, then she remembered that they ordered one bolt to test it when they were deciding on which solids to carry. She had just enough for me to remake the blocks.

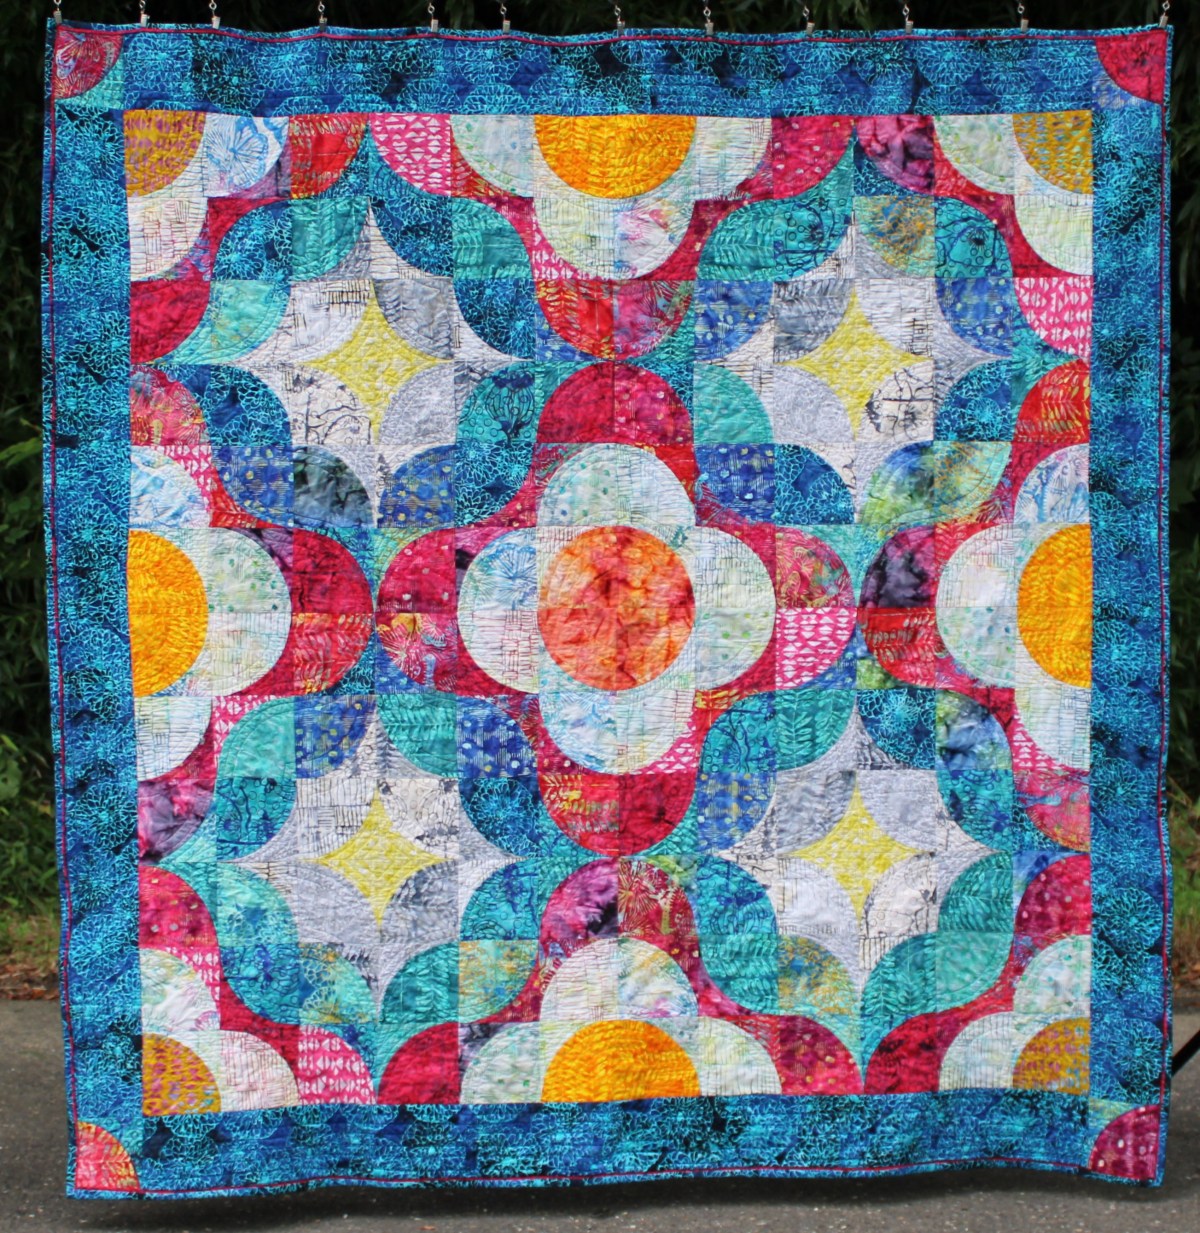
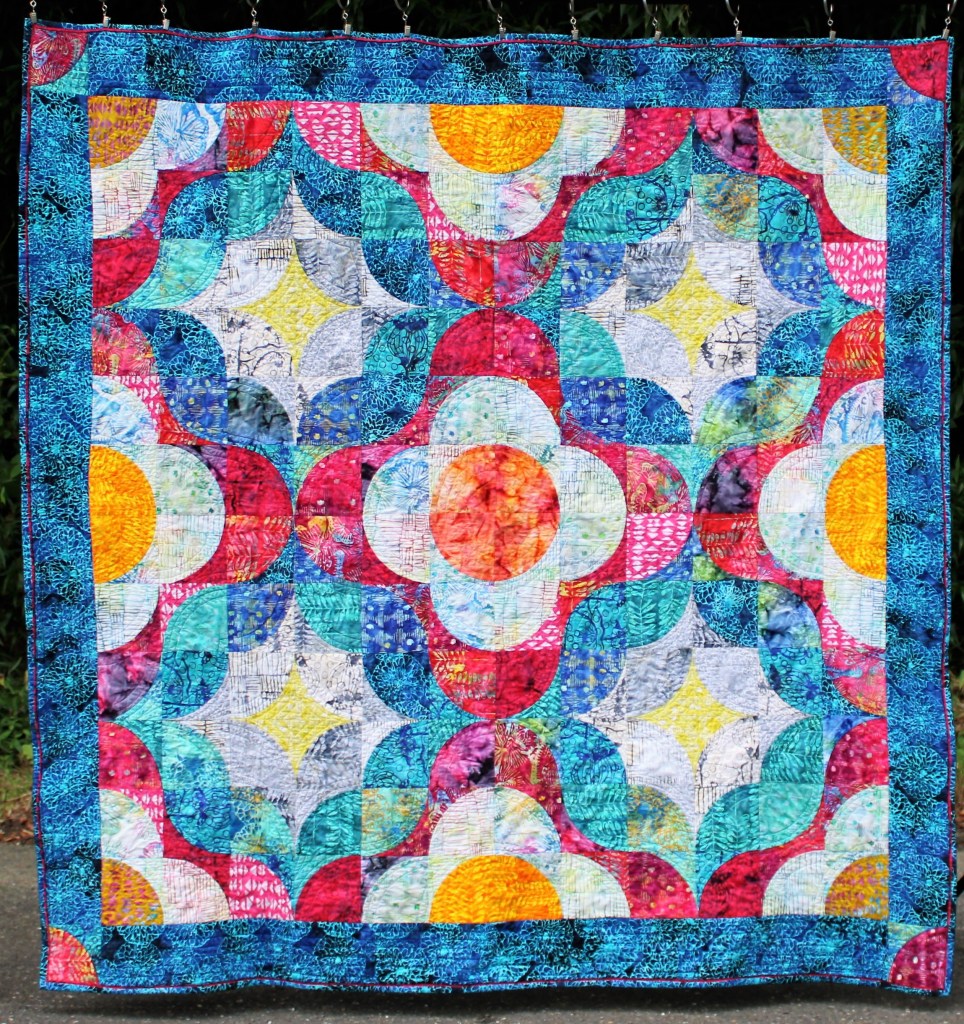
Once I got past that challenge, it was fun. I particularly enjoyed figuring out the quilting patterns. Here is my photo of the finished quilt before I sent it off:

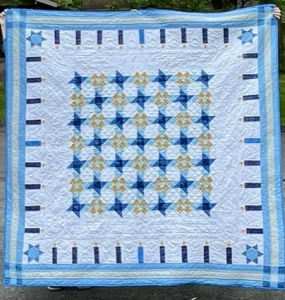
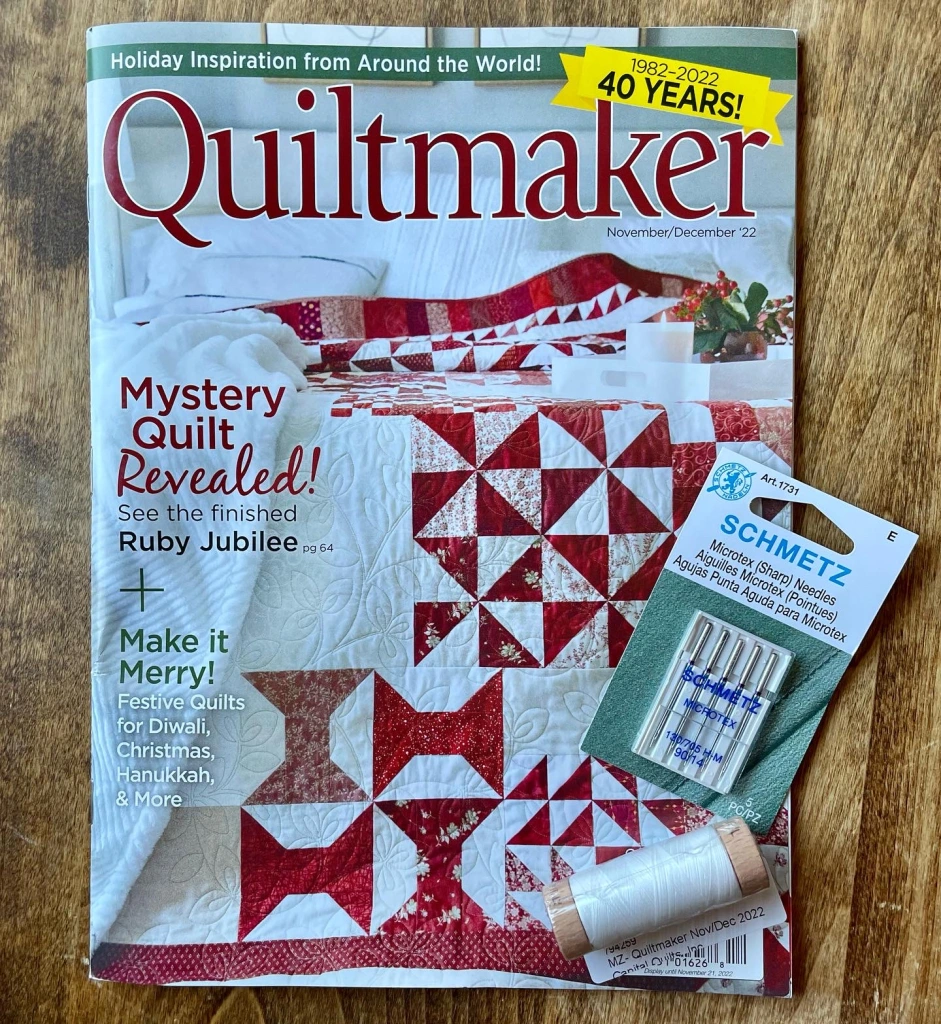
And here are a couple of pictures from the November/December 2022 Quiltmaker Magazine. I had named the quilt “Festival of Lights” but Quiltmaker calls it “Candles Burn Bright”.

Before I could even get a print copy from Golden Peak Media, I went to visit Capital Quilts to take the quilt in for display, and they had copies for sale, so I had to get one!

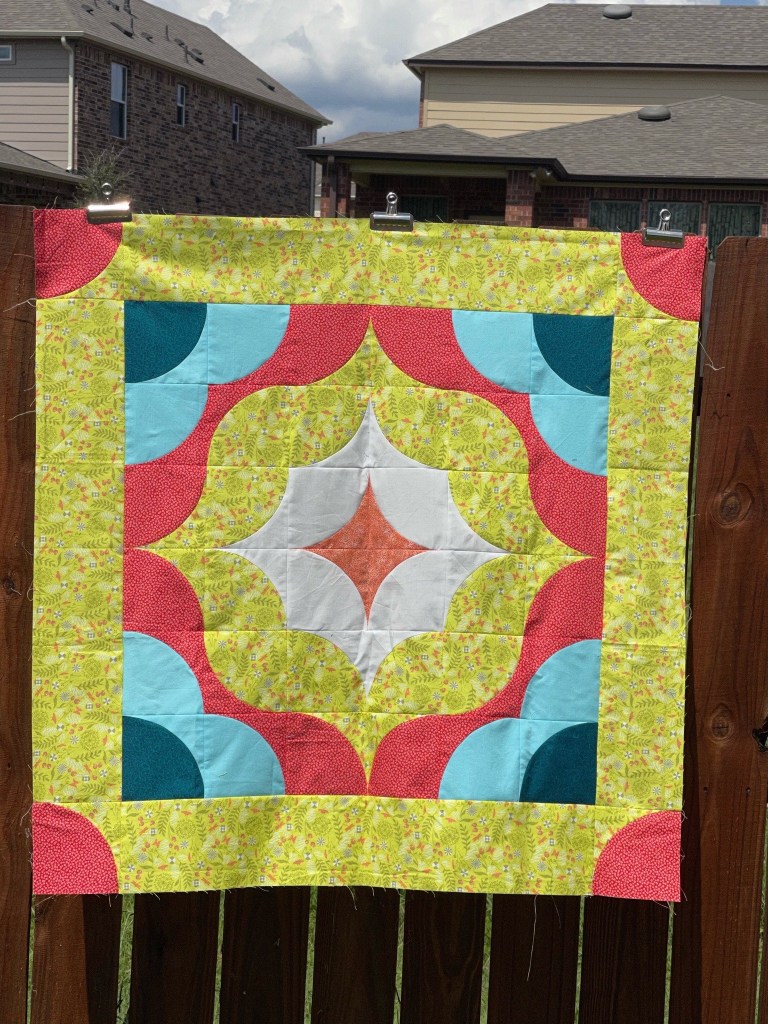
I even designed a table runner version, and I am teaching a class on it at Capital Quilts in November. Here’s the table runner version.

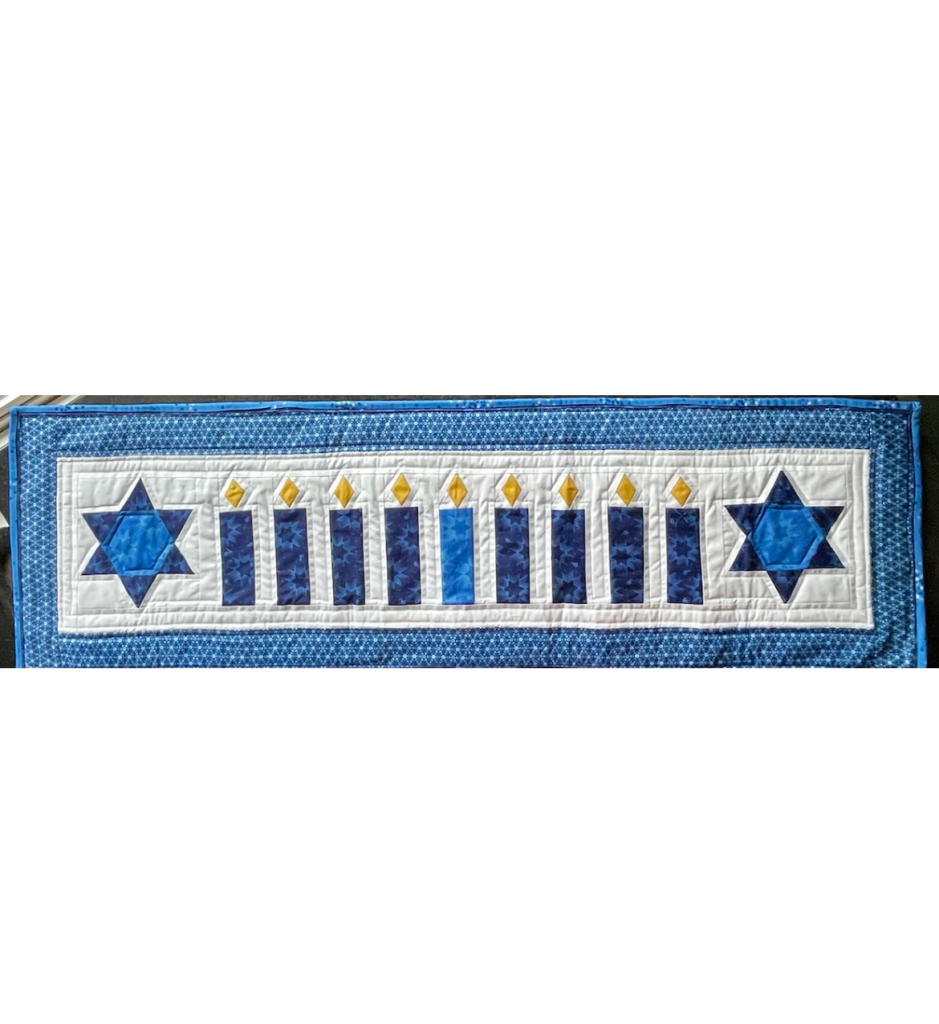
It uses the same Star of David and candle paper piecing, with an adjusted background and borders. I can’t wait to share my paper piecing techniques.

This has been a wonderful experience. The folks at Golden Peak have been wonderfully supportive. And I cannot thank Marianne at Capital Quilts enough for letting me teach this class and share my excitement over this publication!

Categories
Patterns and tutorials Tools and Tips

Closing a Binding

I have been teaching a class on advanced bindings, and I have found that many quilters are challenged with closing the beginning and end of a binding so it is smooth and you can’t find it easily.

There are a lot of tutorials on this subject, but there are as many methods as there are quilters. This is my approach.

First, when I start sewing binding on a quilt, I start on one side, about 6 inches or more from the bottom corner. I leave an 6-10 inch tail of extra binding and then back stitch when I start to attach the binding. In the sample pictures, I am sewing on a machine finished binding, so I am sewing it to the back of the quilt.

Pin at 8 inches where stitching will start (NOTE: this is too close to the corner, I will show what to do if you make the same mistake I did.)

I sew around the quilt and miter each corner (a tutorial for another day). On the last side, I sew down the binding to about 8-12 inches away from the starting point and backstitch. A smaller space will make it more difficult to connect the binding edges, especially on a big quilt. There is no particular downside to having a larger gap, as long as you accurately measure for the connecting seam. You should have at least 7-10 inches of binding at the end that is not attached to the quilt.

This space is not wide enough – it will make it very difficult to join the binding. If you make this mistake, seam rip the stitches from where you started to sew the binding on. Keep opening until there is a gap of at least 7-10 inches.
This is a 7-inch gap – a perfect size to join the binding on a small piece. For a larger piece, a larger gap (up to 10-12 inches) may make it easier to manipulate in the sewing machine.

Now comes the fun part. Lay your free binding ends flat on the edge of the quilt and overlap them. There should be plenty of overlap (more than 3 inches). Cut a small piece (about an inch wide is enough) from the end of one of the binding tails. This will be your measuring piece.

Choose a point for your binding ends to meet. It should be roughly in the middle of the gap. Lay your measuring piece with the center crease on the point you selected.

Measuring piece in the middle of the gap.

On the piece coming from the right side, go to the far left end of measuring piece and mark or cut the fabric. I prefer to cut it at this point, but it makes some people nervous.

On the piece coming from the left side, go to the far right end of the measuring piece and cut or mark the fabric.

Now open up both ends, and on the wrong side of the fabric, make an X in the square at the end.

Ends cut and opened for marking.
Mark at a 45 degree angle.

Position the fabric right sides together at a 90 degree angle in the square you just marked with an X. Pin to secure. NOTE: It is sometimes easier to do this if you fold the quilt in half at the point of the gap.

Take a good look at the tail coming off the intersection of the fabric. If you cut off the long ends, imagine where they were. Think of the two long tails as the “legs” of the binding. You want to sew across the “waist” of the cross fabrics, to give the binding a “belt” (the black arrow). You do NOT want to sew between the legs (the red arrow). (This tip comes from Kat Martinez at Capital Quilts. She says to “give the binding a belt, not a wedgie” and it is the best way I have ever heard to remember this. (By the way, this tip also works when sewing long strips of binding together at an angle.)

If you are making a flanged binding, put a pin through the seam between the flange and the binding fabric on one side where the “waist” mark intersects the seam. Make sure the pin goes through the seam on the other piece. The pin will not be at the center of the X.

Pin on either side of the “waist” line. It is especially important to pin on the “body” side because that side has more tension pulling on the seam area. Sew carefully on the “waist” line, taking out the pins before you sew over them.

I sew across and then check the binding before cutting off the ends. The binding should lay flat.

Trim the seam allowances to 1/4 inch and finger press them open.

Fold the binding on the center line and press.

Lay the binding on the edge of the quilt and pin. Start sewing with a backstitch a few stitches before the gap. Continue until a few stitches past the original starting place and back stitch.

Turn over your quilt and press the binding to see the seam. It should be almost indistinguishable from other seams in the binding.

Final view of the binding join when binding is complete.

Hope this helps with your binding joins. Happy binding!

Categories
Patterns and tutorials

From an Idea to a Quilt Pattern OR How I Work

This spring and summer were crazy busy and so much has happened. First, I have realized that my goal of blogging weekly is just not feasible with my life. So plan on hearing from me once a month. If you want to see what I am doing the rest of the time, please follow my Instagram @betterdonequilts. I typically post about 5 days a week on Instagram. I taught my first quilt class – the Tree of Life Pattern – at Capital Quilts and I learned a lot! I also was featured in Capital Quilts gallery and they did a video of me. You can check it out here.

I have also been working on getting a new quilt pattern ready to publish. I thought I would share the timeline for this one. It is my third self-published pattern, Mai Tais on the Lanai. This is the first quilt I designed in my Cocktail Quilts series, all of which use the Drunkard’s Path block. In September 2019, I was just exploring the Instagram quilting community and found my first give-away string. For this one, you had to follow a person, like the post and make and comment, then follow the prompts to do the same for a total of 10 accounts. The prize was a full set of Anthology Fabrics Island Home batiks, designed by Natalie Barnes. I was shocked when I won and a quilty mentor suggested that I design a new pattern for the fabrics.

I loved the colors of the fabric and immediately thought about tropical cocktails on an elegant lanai. I decided to work with a five-inch Drunkard’s Path block, and I used acrylic templates from Whole Circle Studio.

My plan was to write the pattern as I made the quilt. I thought I would be done by the end of 2019. Unfortunately, at the beginning of November a close family member was seriously ill and I spent November and December flying back and forth between their Midwestern home and my job on the East Coast. Then came 2020…

The upside of teleworking full time was that the 1 1/2 to 2 hours I spent commuting 3-4 days a week was now available for sewing. I finished my first Mai Tais on the Lanai quilt in April 2020, and I loved how it turned out!

I only used fabrics from the collection and I only purchased the blue for the border and binding. I used the scraps and fat quarters that did not make it on the front on the pieced back. This is one of my favorite pieced backs!

I quilted it using the walking foot on my Bernina 1260. I did a simple echo of the tile shapes and it worked out very well.

I did write down directions and took pictures as I worked on the quilt. But the pattern still needed some work and I set it aside “until I had time”. Early in 2021, Amanda from Prairie Folk Quilt Co. put out a call for pattern designers for her subscription service. I sent her a couple of ideas and she liked Mai Tais on the Lanai for a summer quilt. I worked quickly to get the pattern ready for testers and put out a call on Instagram. I finished the instructions, had sample illustrations from my excellent graphic designer (who happens to be my son). I ended up with five awesome testers who gave me critically important feedback on my quilt math, directions that were not clear, illustrations that they wanted and formatting. Here are a few of their quilt tops:

@praterclp
@justaquiltingirl
@sosunny_quilts
@hasmeinstitches

I sent the finished pdf off to Amanda, and started to prepare the print version of the pattern. Print versions often are a little different to allow quilters to see key information, like fabric requirements, without opening the pattern.

The finished pattern has four sizes and a 2-color and 6-color version. It is by far more complicated than anything I have written before. I am very grateful for the experience I gained writing up the pattern for Playtime for the MQG Journal.

During the release week (August 2-August 9, 2021) the Mai Tais on the Lanai pattern is on sale for $10. Get your copy now, before the price goes up!

Categories
Patterns and tutorials

Wheelchair Quilts

As you know, I am a nurse and that affects my approach to quilting, especially when making Sick Day Quilts. Wheelchair quilts are a special category. There are so many questions I like to ask when planning a wheelchair quilt – Who will use it? Where (indoors, outdoors)? Can the user stand up on their own? and so on…

There are a few basics to remember: 1. Wheelchairs have wheels. You do not want the quilt to get caught in the wheels. It is bad for the quilt and can cause an accident. 2. People are different sizes. A wheelchair quilt for a child will be shorter and narrower than one for a large, older adults. I am offering one size of wheelchair quilt here, but this can be customized for any size.

If you are making wheelchair quilts as a service or charity project, remember to make some in a wide variety of colors and patterns. Not everyone like florals, or cats, or geometric prints. Some people like solids, or sports prints or regional prints. I strongly encourage making wheelchair quilts for gifts and donation.

The full directions are on my tutorial page and are here.

I made my test quilt in leftover Baltimore Orioles fabric and scraps of leftover orange, black and white prints. The pattern is very flexible. I decided to play with disappearing four patch patterns, so my squares were smaller than the 9 inches called for in the pattern. I just increased the border width to get the size I needed. You can also make it out of large print squares. The instructions specify four-patches, but any square that finishes at 9 inches will do. This is a great project for charm packs. This would also be a great use for test blocks from other quilts. If they are less than 9 inches, you can border them to get the right size.

WOF=Width of fabric

All seams are ¼ inch. All fabric should be sewn right sides together. Press after each seam. WOF = Width of fabric

Fabric needed:

  • Color 1 = ½ yard
  • Color 2 = ½ yard
  • Border = ½ yard
  • Binding = 1/3 yard Border fabric, 1/3 yard contrasting color (color 1 or 2)

Cutting Instructions:

  • Color 1: Cut (3) 5 x WOF. Sub cut (23) 5 inch squares.
  • Color 2: Cut (3) 5 x WOF. Sub cut (23) 5 inch squares.
  • Border: Cut (2) 2 ½ inch x WOF, Cut (2) 3 ½ inch x WOF
  • Binding: Border fabric: Cut (4) 1 3/8 inches x WOF. Contrasting fabric: Cut (4) 1 5/8 x WOF

Piecing

  1. Make 9 four patch blocks with color 1 and color 2 alternating.
  2. Assemble the quilt in four rows of three blocks each.
  3. Add 3 ½ inch borders down the sides. Measure the quilt lengthwise through the middle. Cut each border that exact length. Mark center on border and quilt top and pin border to quilt top matching centers. Sew with
  4. Add 2 ½ inch borders to top and bottom using the same instructions as step 3, but widthwise.  

Finishing

  1. Layer backing (wrong side up), batting, and quilt top (right side up). Baste the layers together and quilt as desired.
  2. Trim the quilt square.
  3. Binding-
  • Bind as desired. I like a flanged, two-color binding. The binding fabric (background fabric) will be the strip cut 1⅜″ wide, the flange fabric (Fabric E) will be the strip cut 1⅝″ wide.
  • Take the 1⅜″ strips and 1⅝″ strips. Cut off all the selvedge edges. Sew four 1⅜″ strips together end-to-end with a 45-degree angle. To do this, layer the right sides of the strips together at a 90-degree angle. Draw a 45-degree angle from lower right to upper left. Sew on the line. Cut extra fabric away to leave a ¼″ seam allowance. Press open. Repeat with all four of the 1⅝ ″ strips.
  • Then sew the 1⅝ ″ strips together in the same manner.
  • Sew the  two strips together along the long edge.
  • Press seam allowance toward the background fabric (the 1⅜″ strip) and away from fabric E (the 1⅝″ strip). Now fold over with wrong sides together so the raw edges meet and press. About 1/8″ of fabric E will show above the background fabric on the right side of the binding. Only fabric E will be seen on the wrong side of the binding.
  • On the back of the quilt, lay the binding with raw edges matching the raw edge of the quilt and the flange side (Fabric E) up. Start on the long side, 3 inches above the bottom corner. Stitch binding to back with ¼″ seam.
  • At the first corner, stop stitching ¼″ before the corner (A) and stitch off the corner at a 45-degree angle (B). Then fold the binding down as shown (C). Starting at the edge, backstitch then continue with a ¼″ seam to the next corner. Finish two corners as described above.
  • Stop 3 inches above the third corner, which should be at the bottom of the quilt. Back stitch and cut off the binding. The edge does not need to be turned under because it will be cut off for the toe box.
  • Start again on the bottom edge 3 inches from the corner and attach binding up to 3 inches before the fourth corners.
  • Your top two corners will have mitered binding. The bottom two corners will have 3 inches on either side left unbound.
  • Press the binding out with seam pressed toward binding. Then press binding over to the front of the quilt. Pin corners with miters. Slowly stitch in the ditch of the flange all the way around the quilt using thread that matches the flange color. 

Keep the remaining binding for the toe box

Forming the Toe Box

  1. After you bind the quilt, cut a 6.5 inch square from each of the bottom two corners. That should cut off the border and one patch of each of the corner four-patches.
  2. Sew the remaining raw edges to form a 90 degree angle. The bottom of the quilt should be like two sides of a box.
  3. Enclose the raw seams in additional binding. Make sure you turn the raw edges of the binding under before sewing.
Toe box side view
From back

I would love to see your wheelchair quilts and hear about who is using them!

Categories
Patterns and tutorials

Inset Circle Tutorial

The project I have been working on has seven inset circles. While I love the look, it can be overwhelming. The project is designed to teach curves and help quilters overcome their fear of curves and inset circles. After making all my circles and fitting them into the quilt, here is my approach to inset circles and all of the tips I can think of to take the fear out of circles.

TIP: Take your time. Making inset circles is not fast. You will get a bit faster as you get more comfortable with them, but it is not fast. Put on some non-distracting music, take a deep breath and take your time.

TIP: Use a lot of starch. I find that if the fabric is not starched enough, it distorts more when I sew the inset circle.

I start by heavily starching both the background and circle fabrics. For this tutorial, I will be making a 10 inch finished circle, set into a 10.5 inch block. Cut an 11 inch square of the circle fabric (off-white) and a 12 inch square of the background fabric (aqua).

I really like this EZ Circle Cut template. But you can use any half or quarter circle that is accurate. For a 10 inch diameter finished circle, you will cut a 9.5 inch circle out of the middle of the 12 inch square. On this template, you fold the fabric in half, put the fold on the fold line and cut at the 9 inch groove.

The circle fabric needs to be bigger than the cut out from the background. For a 10 inch diameter finished circle, a 10.5 inch diameter circle needs to be cut. On this ruler, you fold the fabric in half, put the fold on the fold line and cut at the 10 inch groove.

Once your background and circle are cut, fold each separately into equal quarters and press lightly with the iron to mark the quarters as you can see below.

Start by folding the background fabric so that the fabrics are right side together and the circle is laying flat. Pin the quarter marks of the background to the quarter marks of the circle.

Then pin around the circle to make sure that the fabric is equally distributed and is not pleated or kinked. Pin from the background side.

TIP: I find that fine or very fine pins work best.

Some people swear by glue basting instead of pinning, but it has never worked well for me.

I find that it works best if I sew with the circle side down. Bernie, my sewing machine, is set up so the needle stops in the down position, and with the stitch length at 2, slightly shorter than the usual 2.5 stitch length. I always check my bobbin and my tension before I start sewing a set-in circle.

Stitch slowly until you come to the first pin. Pull the pin, use your finger to check that the fabric is laying flat, and slowly stitch to the next pin. Repeat all the way around the circle.

Secure your stitch at the end by backstitching or taking a number of tiny stitches.

After sewing, clip the seam allowance no more than 1/2 of the way to the seam. I usually clip about every inch around the circle.

After clipping all the way around, finger press the seam allowance toward the background.

Then press lightly all the way around, making sure the seam allowance is toward the background.

Then I spray the circle with water and press heavily to remove the quarter lines and finish the block.

Once the block is pressed and cooled, remove from the ironing board and take to the cutting board.

Measure 10.5 inches square, leaving 1/4 inch seam allowance around each side of the circle, as shown above. Trim.

That’s it – you now have a 10.5 inch block with a 10 inch diameter inset circle. It will make a 10 inch finished block with a fully inset circle.

Categories
Patterns and tutorials

Double Mitered Borders Tutorial

A friend recently shared that one of her quilting goals for 2021 is to master the mitered borders. I have found that making multiple mitered borders is just as easy as a single border, so I thought I would share my process with you.

Step 1: Sew the inner border pieces to the outer border pieces using a scant ¼ inch seam. The top/bottom borders should be the width of the quilt + twice the width of the border +1 inch. For example, if the quilt is 50 inches wide, the inner border is 1 inch wide and the outer border is 4 inches wide the length of the top/bottom borders should be 60 inches: 50 + (2 x 1 inch) + (2 x 4 inches) + 1 inch = 50+2+8+1. The right/left side borders should be the length of the quilt + twice the width of the border + 1 inch.

Press the seam allowance of two strips toward the inner border (place on sides of quilt) and two strips towards the outer border (place on top and bottom of quilt).

Find the center of each border unit by folding it in half. Mark with a pin. For top/bottom borders, measure 1/2 the width of the quilt on either side of the center mark and pin. Then fold the end pin to the center pin to find the quarter mark and mark with pins. You should have five pins. For example, if your side is 25 inches the pins would be placed like this:

Step 2: Pin the quilt top and borders.

Find the center of each side, the top and bottom top and mark with a pin. Find the midway point between the center and end on either side and mark with a pin, as above. Align the center and quarters of the border with the centers of the top and pin at marks. Align end point of top with outer pins on border strip and pin. Pin rest of borders to top.

You should have border fabric left on either end of the quilt top.

IMPORTANT – Mark the quilt top on the wrong side with a dot 1/4 inch from each corner. Start sewing at one 1/4 inch mark and stop stitching at the mark ¼ inch before the end of the top. Backstitch at beginning and end of seam one or two stitches. Sew all four border pieces to top leaving ¼ inch unsewn on each strip at every corner.

Press seams toward the quilt top.

Step 3: Making the miter.

A B C

Lay the quilt on ironing board with the finished side down (A). Fold quilt diagonally as shown (B) so the back side of the quilt is showing (C). NOTE: the A1, A2, B1 and B marks on the illustration are for reference only, you do not need to add these marks to your quilt. Line up the borders from the two sides aligning the marks 1/4 inch from the edge of the quilt top (C).

Align the border strips. Mark the border at a 45 degree angle, as shown (C). Pin, matching creased lines and seams. Slowly machine baste from backstitching point to outer edge of quilt.

Press seam open and check accuracy with 45-degree rule. If it is accurate, sew over basting stitch , from backstitching point to outer edge of the quilt. Remember to backstitch one or two stitches at beginning and end of this seam because it will be the outer edge of the quilt. Remove basting stitch. Trim the seam allowance to approximate ¼ inch. Repeat this process for the other three corners.

That’s it – a double mitered border!

Categories
Patterns and tutorials Uncategorized

Opportunities

I am so excited! This week I heard from the Electric Quilt Company that my submission in the October EQ8 Design Challenge – the Good Vibes challenge, was selected by Benartex as one of this month’s winning designs! You can see the announcement here and the original challenge with all of the entries here. I am particularly excited because I really love the Good Vibes fabric line from Christa Watson (also known as Christa Quilts).

Good vibes bundle from Benartex

I would like to encourage all of you that use EQ8 to participate in some of these monthly Design Challenges. I started trying them in January to learn how to use the EQ8 program my daughter gave me for Christmas, and to practice my design skills. This is the first design contest or challenge that I have ever won, so even though it may seem like a small little thing to you, to me it is a great opportunity.

Aren’t these fun? I can’t wait to get started!

So what does this have to do with UFOs? It gives me another project to get started. And another pattern to write up. This is another of my cocktail quilts based on the Drunkard’s Path block. In this instance it is distorted to be taller and skinnier, so I think it needs a name of a cocktail that fits in the tall, skinny Tom Collins glass. Maybe “Zombie” or “Singapore Sling”. What would you name this quilt?

Categories
Patterns and tutorials

100 Day Quilt-a-Long

Here are the full instructions for the #100qal, currently on Instagram.

This is a super easy, semi-improvisational quilt with few corners to match. It works well with scraps, jelly rolls or yardage and uses 2.5 inch wide strips.

If you are like me and have been cutting your scraps into 2.5 inch strips for 5 years, you may have enough in your stash, or you may need to supplement.

All fabrics should be cut to exactly 2.5 inches wide. Seam allowances are calculated into fabric needed.  **If you use precuts, make sure they are 2.5 inches or cut them to size.

 KingQueenTwinThrowBaby
Dimensions104 x 96 in.88 x 96 in.64 x 88 in.49 x 64 in.32 x 48 in.
Columns (column width)4 (26 in.)4 (22 in.)4 (16 in.)2 (24.5 in.)2 (16 in.)
 Rows48484432
Choose one of theseYardage18 yards15.5 yards10 yards5.5 yards
Jelly Rolls6.55.5421
40 inch strips130110734020
Inches of strips5088432029041600792

The primary directions are for a king or queen sized quilt. Other sizes will finish faster:

  • King or Queen 96 days of strips = 4 days to assemble
  • Twin 88 days of strips = 12 days to assemble (or a 90-day project)
  • Throw 64 days of strips = 36 days to assemble (or a 70-day project)
  • Baby 48 days of strips = 52 days to assemble (or a 50-day project (you could make 2!)

Requires two contrasting fabric choices. About half of the fabric should be foreground color (A) and about half background color (B). You can use darks and lights, colors and neutrals, two different colors, etc. Decide which fabric you want as dominant – you will need a little more of this fabric.

I am using up my stash of strips and have approximately half that are cream or white and half that are purple, blue or teal (guess which colors I use most).

Piecing Days 1-24, 26-49, 51-74, 76-99

Sew one A to one B piece, end to end. Sew second A to second B piece, end to end.

Cut so both strips are 26.5 (22.5, 16.5, 25, 16.5) inches wide – vary cuts so light and dark are not the same length. The effect is best if the dominant color is at least 1/2 of the strip length. Use the remainder for another day. Each strip should have one A and one B piece after trimming.

 A B
 B A

Sew strip 1 to strip 2 lengthwise.

 A B
 B A

That’s it!

Assembly Days 25, 50, 75, 100

Every 24 days (24, 22, 16, 12), you will have enough strip units to assemble a column for your quilt.      

To assemble:

Layout your strips until you like the combination. Alternate A on right with B on right as shown.

BA
AB
BA
AB

Sew strips into columns first:

For baby quilt – two columns of 24 rows each

For throw – two columns of 32 rows each

For twin – four columns of 44 rows each

For queen and king – four columns of 48 rows each.

Then sew columns together, matching corners.

Add a border if you wish. Your top is done and ready for basting, quilting and binding!